CellHub Customer Display — installation and use
The Customer Display is an Android tablet on your counter. During a sale it shows the customer the items, the discount, the taxes and the total. Between sales it plays your videos.
- The tablet connects directly to the CellHub computer over your store Wi-Fi.
- It only displays. It can never change anything in CellHub.
1. Requirements
- Tablet: Android 7.0 or later. The tested app is 1.1.1.
- Computer: CellHub Pro for Windows, open on the store computer.
- Network: the tablet and the computer on the same Wi-Fi. A guest network or one with "client isolation" will not work.
- Router (recommended): a DHCP reservation, so the computer always keeps the same IP address.
2. Download and install
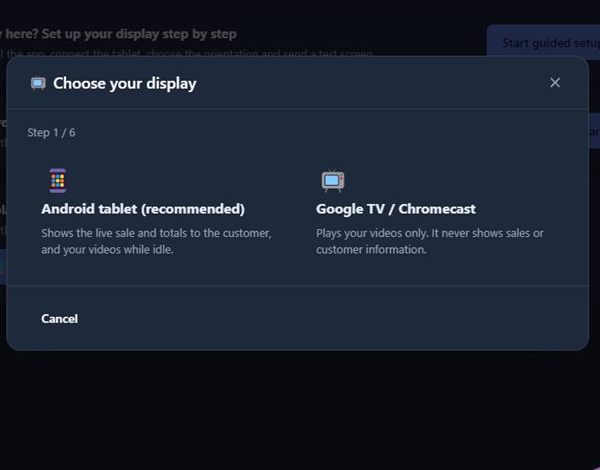
- In CellHub go to Settings → Customer Display → Start guided setup, choose Android tablet, and follow the steps.
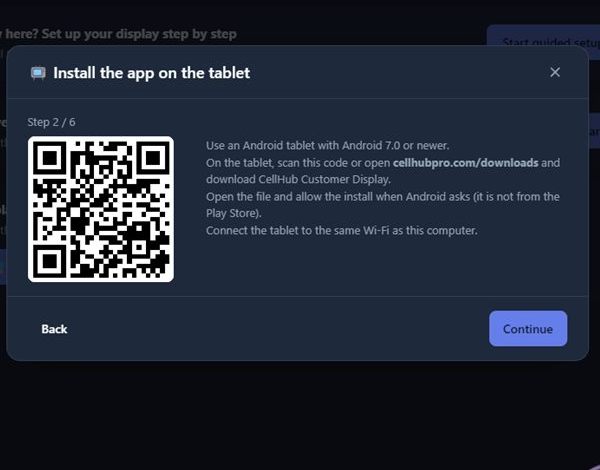
- Install the app on the tablet:
- Scan the QR in the guided setup, or open cellhubpro.com/downloads on the tablet.
- Tap Download for Android.
- Optional: compare the SHA-256 shown on the page with the file.
- Open the file. Android asks you to allow installs from your browser; that is expected, because the app does not come from Google Play.
3. Connect to the CellHub computer
- Start the display service. Click Start display service. Leave Start it automatically every time CellHub opens ticked. The address appears, for example
http://192.168.1.50:47617.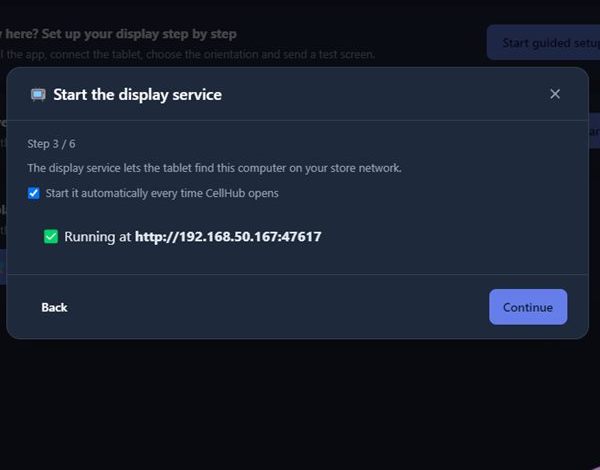
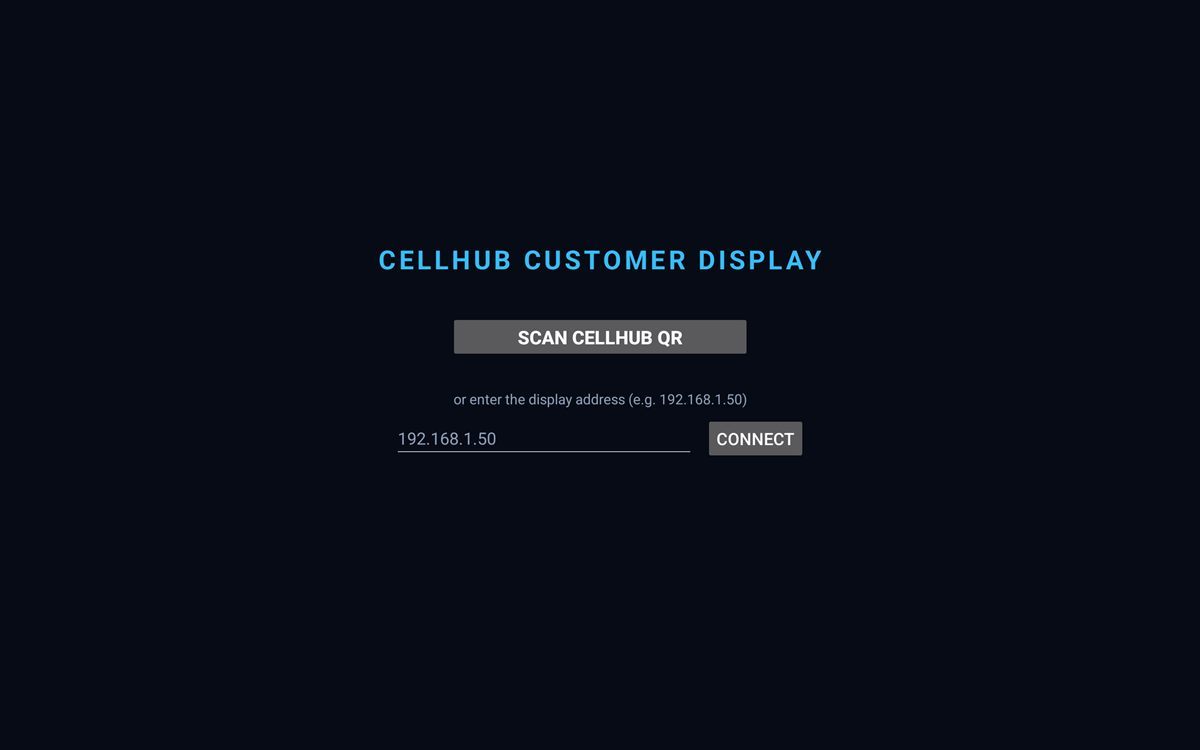
- Point the tablet at the computer. Open CellHub Customer Display on the tablet. Then either:
- tap Scan CellHub QR and scan the QR from the guided setup, or
- type the address and tap Connect.
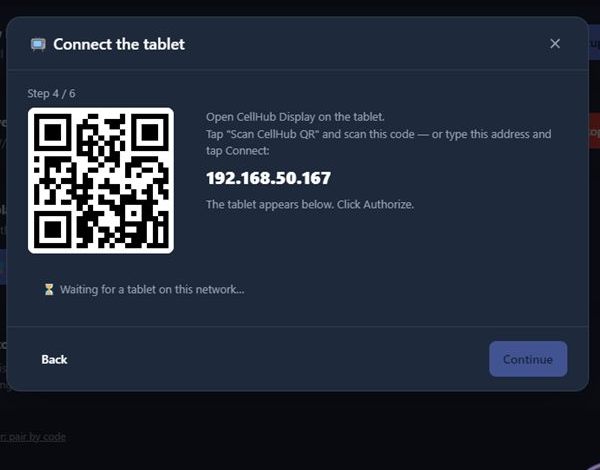
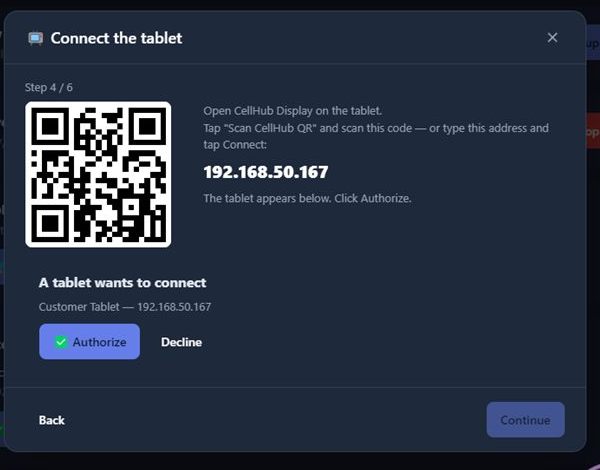
- Authorize the tablet. The tablet appears on the computer as "A tablet wants to connect". Click Authorize. Only one tablet can be authorized at a time.
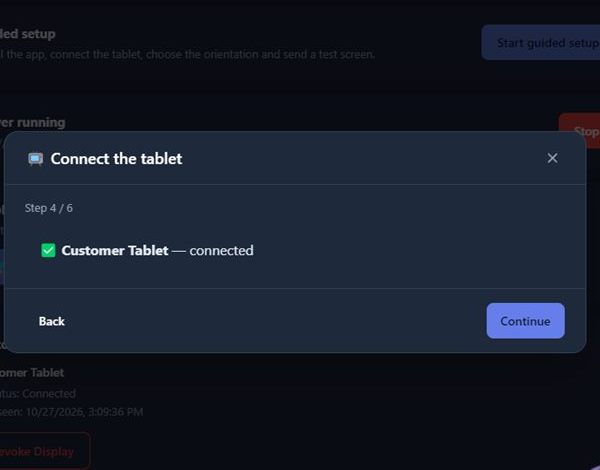
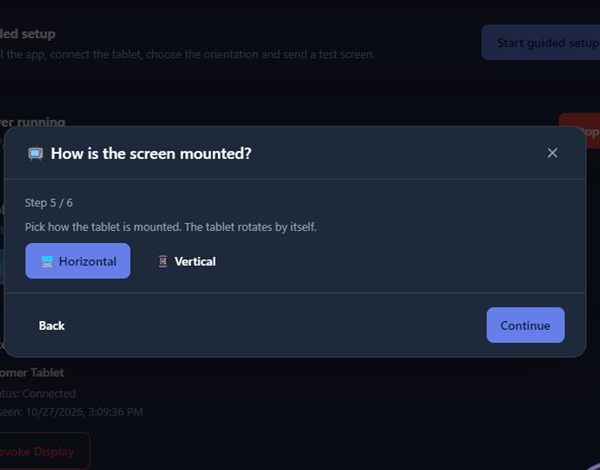
The tablet then shows your store's welcome screen: - Orientation. Choose Horizontal or Vertical to match how the tablet is mounted.
4. First successful operation
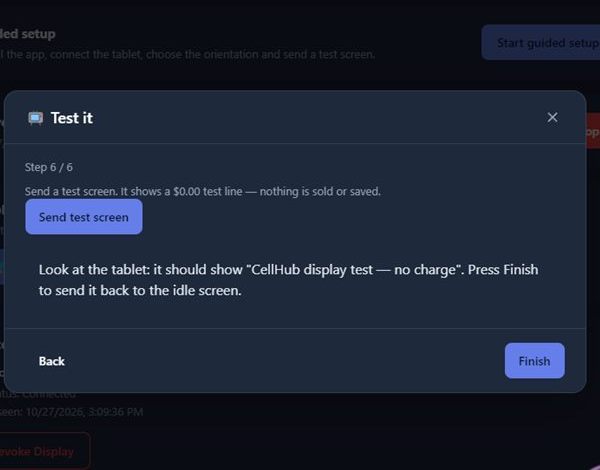
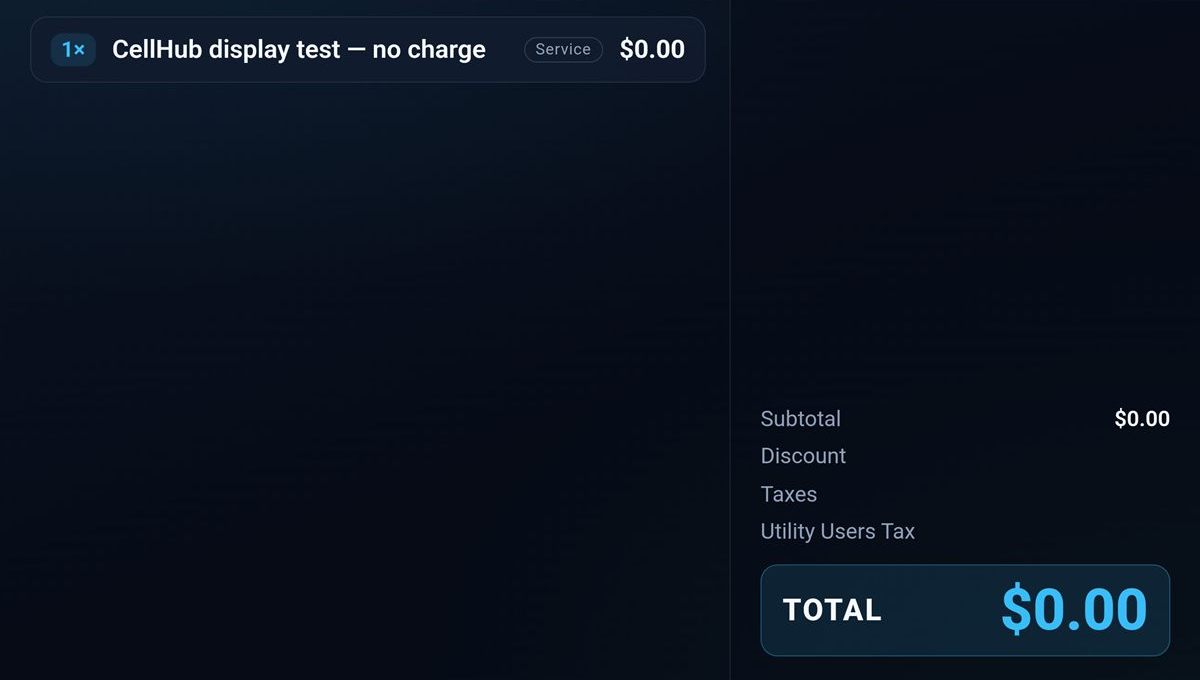
- Test screen. In the last step, click Send test screen. The tablet shows a $0.00 test line. Nothing is sold or saved. Click Finish and the tablet goes back to the welcome screen.
- Real sale. Make a sale in the POS. The tablet shows the cart and the total exactly as the register calculates them.
5. Daily use
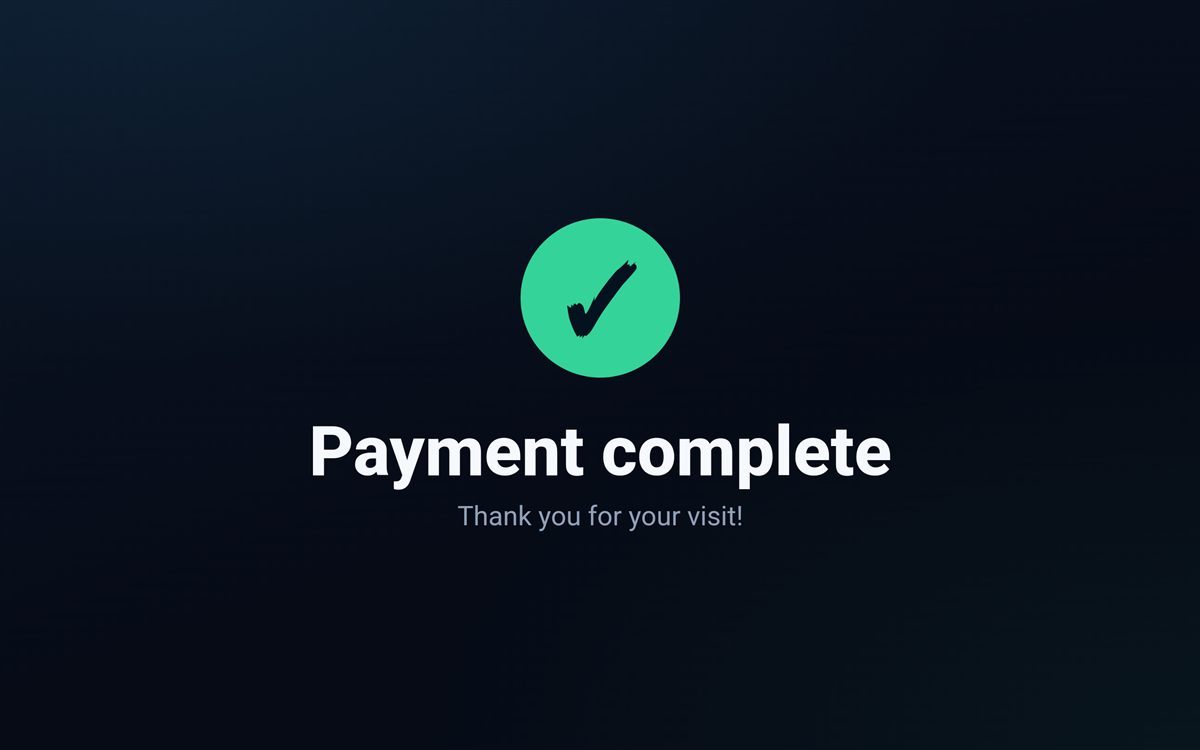
- During a sale: the items, discount, taxes and total. When it is paid, Payment complete, then the welcome screen again after a few seconds.
- Between sales: the videos and photos you add in CellHub → Videos.
- Customer information: the tablet shows the customer's name when one is attached to the sale. When the cashier asks the customer to confirm a phone number, it shows that number.
- Phone payments: these lines show the carrier, not the phone number.
- Storage: the tablet stores only its connection key and a device ID.
6. Restart and reconnection
- The tablet loses Wi-Fi. It shows Reconnecting… and comes back by itself. In testing it was back about 8 s after the network returned.
- CellHub closes or the computer restarts. The tablet shows Reconnecting… with the last screen. When CellHub opens again, it reconnects and returns to the welcome screen. It never keeps a previous customer's cart. In testing this took about 6 s.
- CellHub 2.5.64 starts the display service by itself when a tablet is authorized.
- On older versions, turn on Videos → Auto-start display.
- The computer's address changes. The tablet shows the address it is trying and a Pair again button. Type the new address, then click Replace Display on the computer. A DHCP reservation in the router prevents this.
7. Troubleshooting
| What you see | What to do |
|---|
| The tablet never appears on the computer | Check that both are on the same Wi-Fi, not a guest network. Check that the address on the tablet is the one CellHub shows. Allow CellHub in Windows Firewall on private networks. |
| "Port 47617 is in use by another program" | Close the other program, or restart the computer. |
| Reconnecting… never ends | Check that CellHub is open and that Settings → Customer Display says the server is running. |
| The test says "The tablet is not connected right now" | Open the app on the tablet, keep it in front, and check the address. |
| "Another tablet wants to connect" | Click Use this one instead to replace the current tablet, or Decline. |
| You need the tablet's own menu | Tap the top-left corner five times quickly. From there you can pair again or exit. |
| The tablet did not rotate | Check Horizontal/Vertical in Settings. The tablet applies it on the next sale activity. |
8. Updates and uninstall
- Update: download the newer version from cellhubpro.com/downloads and install it over the current one. It keeps its connection, because updates are signed with the same CellHub key.
- Uninstall: remove the app in Android Settings → Apps. Then, in CellHub, go to Settings → Customer Display → Revoke Display.
CellHub Customer Display — instalación y uso
La Pantalla de Cliente es una tablet Android en tu mostrador. Durante la venta le muestra al cliente los artículos, el descuento, los impuestos y el total. Entre ventas reproduce tus videos.
- Se conecta directamente a la computadora de CellHub por el Wi-Fi de la tienda.
- Solo muestra: nunca puede cambiar nada en CellHub.
1. Requisitos
- Tablet con Android 7.0 o posterior. La app probada es la 1.1.1.
- CellHub Pro para Windows abierto en la computadora de la tienda.
- Tablet y computadora en el mismo Wi-Fi. No sirve una red de invitados ni una red con "aislamiento de clientes".
- Recomendado: una reserva DHCP en el router, para que la computadora conserve siempre la misma dirección IP.
2. Descarga e instalación
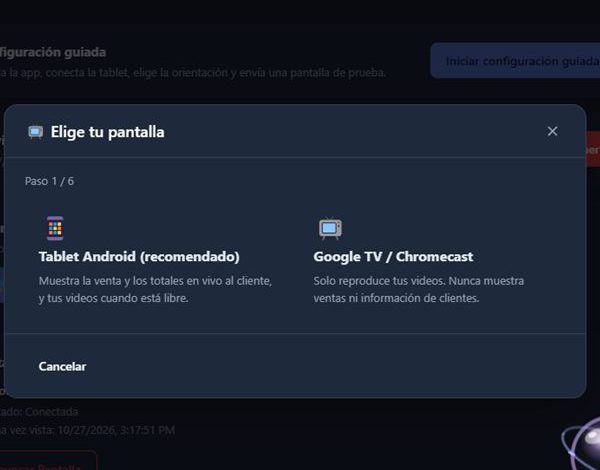
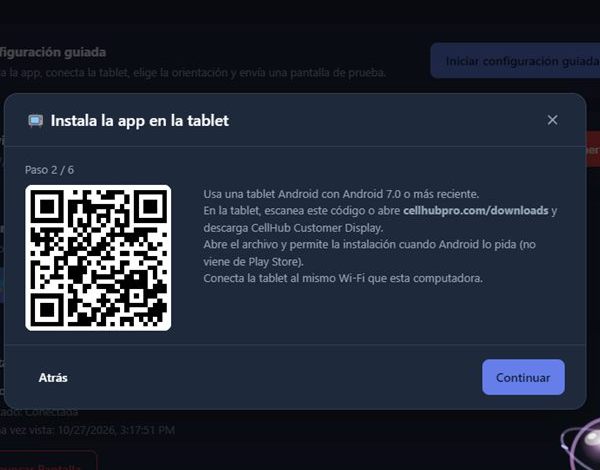
- En CellHub abre Configuración → Pantalla de Cliente → Iniciar configuración guiada, elige Tablet Android y sigue los pasos.
- Instala la app en la tablet:
- Escanea el QR de la configuración guiada, o abre cellhubpro.com/downloads en la tablet.
- Toca Descargar para Android.
- Opcional: compara el SHA-256 de la página con el archivo.
- Abre el archivo. Android te pide permitir instalaciones desde el navegador. Es normal, porque la app no viene de Google Play.
3. Conexión con la computadora de CellHub
- Inicia el servicio de pantalla. Haz clic en Iniciar servicio de pantalla y deja marcada la opción Iniciarlo automáticamente cada vez que abra CellHub. Aparece la dirección, por ejemplo
http://192.168.1.50:47617.
- Conecta la tablet. En la tablet abre CellHub Customer Display. Toca Escanear QR de CellHub y escanea el QR del asistente, o escribe la dirección y toca Conectar.
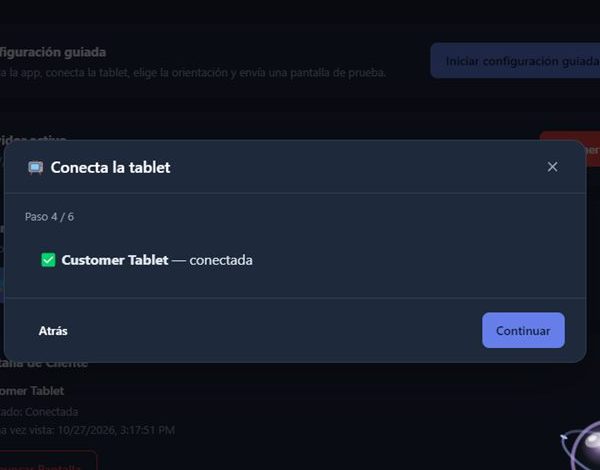
- Autoriza la tablet. En la computadora aparece "Una tablet quiere conectarse": haz clic en Autorizar. Solo se autoriza una tablet a la vez.
La tablet muestra la pantalla de bienvenida de tu tienda: - Orientación. Elige Horizontal o Vertical según cómo esté montada la tablet.
4. Primera operación exitosa
- Prueba. En el último paso haz clic en Enviar pantalla de prueba. La tablet muestra una línea de prueba de $0.00; no se vende ni se guarda nada. Haz clic en Terminar y la tablet vuelve a la pantalla de bienvenida.
- Venta real. Haz una venta en el POS. La tablet muestra el carrito y el total exactamente como los calcula la caja.
5. Uso diario
- Durante la venta: muestra los artículos, el descuento, los impuestos y el total. Al cobrar aparece Pago completado y, unos segundos después, otra vez la bienvenida.
- Entre ventas: reproduce los videos y fotos de CellHub → Videos.
- Datos del cliente:
- Muestra el nombre del cliente cuando hay uno en la venta.
- Cuando el cajero le pide al cliente confirmar un teléfono, muestra ese número.
- Las líneas de pago de celular muestran la compañía, no el número.
- Qué guarda la tablet: solo su clave de conexión y un identificador del dispositivo.
6. Reinicio y reconexión
- Si la tablet pierde el Wi-Fi: muestra Reconectando… y vuelve sola. En la prueba volvió unos 8 s después de regresar la red.
- Si CellHub se cierra o la computadora se reinicia: la tablet muestra Reconectando…. Al abrir CellHub otra vez, se reconecta y vuelve a la bienvenida, sin conservar el carrito de un cliente anterior. En la prueba tardó unos 6 s.
- CellHub 2.5.64 inicia el servicio de pantalla solo cuando hay una tablet autorizada.
- En versiones anteriores, activa Videos → Auto-iniciar pantalla.
- Si cambia la dirección de la computadora: la tablet muestra la dirección que intenta y un botón Volver a emparejar. Escribe la nueva dirección y luego haz clic en Reemplazar Pantalla en la computadora. Una reserva DHCP en el router lo evita.
7. Solución de problemas
| Lo que ves | Qué hacer |
|---|
| La tablet nunca aparece en la computadora | Revisa que ambas estén en el mismo Wi-Fi (no en una red de invitados). Revisa que la dirección de la tablet sea la que muestra CellHub. Permite CellHub en el Firewall de Windows en redes privadas. |
| "El puerto 47617 está ocupado por otro programa" | Cierra ese programa o reinicia la computadora. |
| Reconectando… no termina | Revisa que CellHub esté abierto y que Configuración → Pantalla de Cliente indique el servidor activo. |
| La prueba dice "La tablet no está conectada ahora" | Abre la app en la tablet, déjala al frente y revisa la dirección. |
| "Otra tablet quiere conectarse" | Usar esta en su lugar reemplaza la actual; Rechazar la ignora. |
| Necesitas el menú propio de la tablet | Toca cinco veces rápido la esquina superior izquierda. Desde ahí puedes volver a emparejar o salir. |
| La tablet no giró | Revisa Horizontal/Vertical en Configuración. Se aplica con la siguiente actividad de venta. |
8. Actualizaciones y desinstalación
- Actualizar: descarga la versión nueva desde cellhubpro.com/downloads e instálala encima de la actual. Conserva su conexión, porque la versión nueva está firmada con la misma llave de CellHub.
- Desinstalar: quita la app en Ajustes de Android → Aplicaciones. Luego, en CellHub, ve a Configuración → Pantalla de Cliente → Revocar Pantalla.
CellHub Customer Display — instalação e uso
A Tela do Cliente é um tablet Android no seu balcão. Durante a venda ela mostra ao cliente os itens, o desconto, os impostos e o total. Entre as vendas ela reproduz seus vídeos.
- O tablet se conecta direto ao computador do CellHub pelo Wi-Fi da loja.
- Ele só exibe: nunca altera nada no CellHub.
1. Requisitos
- Tablet com Android 7.0 ou posterior. O app testado é o 1.1.1.
- CellHub Pro para Windows aberto no computador da loja.
- Tablet e computador no mesmo Wi-Fi. Rede de convidados ou com "isolamento de clientes" não funciona.
- Recomendado: uma reserva DHCP no roteador, para o computador manter sempre o mesmo IP.
2. Download e instalação
- No CellHub abra Configurações → Tela do Cliente → Iniciar configuração guiada, escolha Tablet Android e siga os passos.
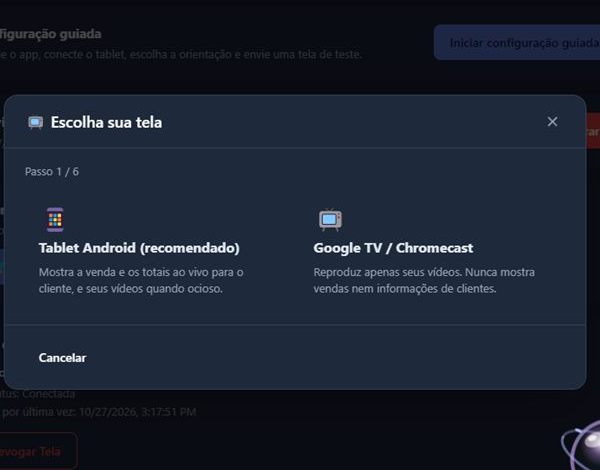
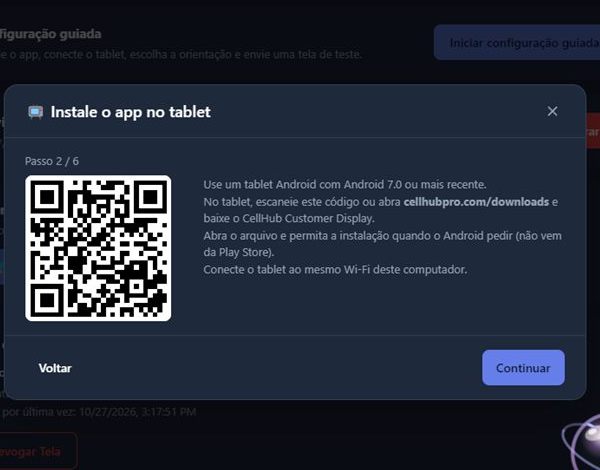
- Instale o app no tablet:
- Escaneie o QR da configuração guiada, ou abra cellhubpro.com/downloads no tablet.
- Toque em Baixar para Android.
- Opcional: compare o SHA-256 da página com o arquivo.
- Abra o arquivo. O Android pede para permitir instalações pelo navegador. Isso é esperado, porque o app não vem do Google Play.
3. Conexão com o computador do CellHub
- Clique em Iniciar serviço de tela.
- Deixe marcada a opção Iniciá-lo automaticamente sempre que o CellHub abrir.
- O endereço aparece, por exemplo
http://192.168.1.50:47617.
- No tablet abra o CellHub Customer Display. Depois, uma destas opções:
- toque em Escanear QR do CellHub e escaneie o QR do assistente;
- ou digite o endereço e toque em Conectar.
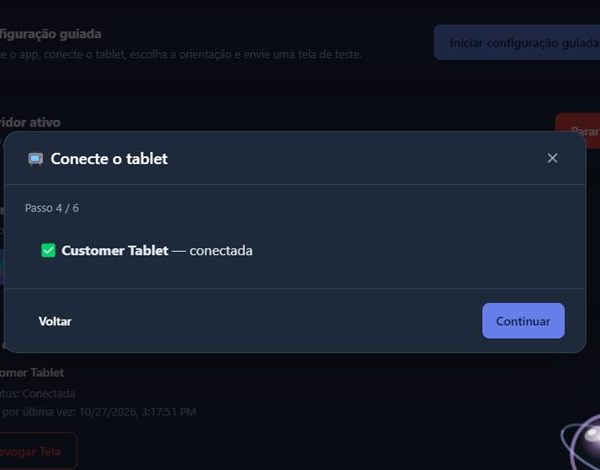
- No computador aparece "Um tablet quer se conectar": clique em Autorizar. Só um tablet fica autorizado por vez.
O tablet mostra a tela de boas-vindas da sua loja: - Escolha Horizontal ou Vertical conforme o tablet estiver montado.
4. Primeira operação bem-sucedida
- No último passo clique em Enviar tela de teste.
- O tablet mostra uma linha de teste de $0,00; nada é vendido nem salvo.
- Clique em Concluir e ele volta para as boas-vindas.
- Faça uma venda no PDV. O tablet mostra o carrinho e o total exatamente como o caixa calcula.
5. Uso diário
- Durante a venda: itens, desconto, impostos e total. Ao receber o pagamento aparece Pagamento concluído e, alguns segundos depois, as boas-vindas.
- Entre as vendas: os vídeos e fotos de CellHub → Vídeos.
- O que aparece do cliente:
- o nome do cliente, quando há um na venda;
- o número de telefone, quando o caixa pede ao cliente para confirmá-lo;
- nas linhas de pagamento de celular, a operadora, não o número.
- O que o tablet guarda: só a chave de conexão e um identificador do dispositivo.
6. Reinício e reconexão
- Se o tablet perder o Wi-Fi: mostra Reconectando… e volta sozinho. No teste, voltou uns 8 s depois que a rede voltou.
- Se o CellHub fechar ou o computador reiniciar: o tablet mostra Reconectando….
- Quando o CellHub abre de novo, o tablet se reconecta e volta às boas-vindas, sem manter o carrinho de um cliente anterior. No teste, levou uns 6 s.
- O CellHub 2.5.64 inicia o serviço de tela sozinho quando há um tablet autorizado. Em versões anteriores, ative Vídeos → Início automático da tela.
- Se o endereço do computador mudar: o tablet mostra o endereço que está tentando e um botão Parear novamente.
- Digite o novo endereço e depois clique em Substituir Tela no computador.
- Uma reserva DHCP no roteador evita isso.
7. Solução de problemas
| O que você vê | O que fazer |
|---|
| O tablet nunca aparece no computador | Confira se os dois estão no mesmo Wi-Fi (não em rede de convidados) e se o endereço digitado é o que o CellHub mostra. Permita o CellHub no Firewall do Windows em redes privadas. |
| "A porta 47617 está em uso por outro programa" | Feche esse programa ou reinicie o computador. |
| Reconectando… não termina | Verifique se o CellHub está aberto e se Configurações → Tela do Cliente mostra o servidor ativo. |
| O teste diz "O tablet não está conectado agora" | Abra o app no tablet, deixe-o em primeiro plano e confira o endereço. |
| "Outro tablet quer se conectar" | Usar este no lugar substitui o atual; Rejeitar ignora o pedido. |
| Você precisa do menu do próprio tablet | Toque cinco vezes rápido no canto superior esquerdo. Dali dá para parear de novo ou sair. |
| O tablet não girou | Confira Horizontal/Vertical nas Configurações. A mudança vale a partir da próxima atividade de venda. |
8. Atualizações e desinstalação
- Atualizar: baixe a versão nova em cellhubpro.com/downloads e instale por cima da atual. A conexão é mantida, porque a atualização vem assinada com a mesma chave do CellHub.
- Desinstalar:
- Remova o app em Configurações do Android → Apps.
- No CellHub, vá em Configurações → Tela do Cliente → Revogar Tela.